… or how to get unsupported stuff to work on Linux.
Every now and then, you are likely to find yourself with an unsupported gadget or two.
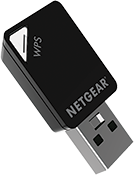
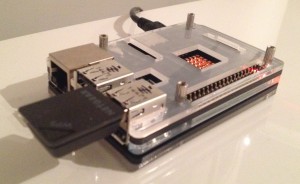
In my case I needed a wifi adapter for my new Raspberry Pi 2. Rather than consult the lists and order one online (the right thing to do) I let my impatience get the better of me and grabbed a Netgear A6100 while passing through local electronics store.
Netgear is a well known brand, should be supported, Raspberry Pi’s support all manner of devices out of the box, dont they?
Unfortunately the Netgear A6100 did not work, and a little research showed this particular device was not on the supported WiFi gadgets list. Hmm…
Rather than dropping it in the unused bits box and waiting for a supported device to arrive, this seems like the perfect opportunity to get another strange and perverse contraption to work.
The need – a Raspbian Linux device driver for the Netgear A6100 WiFi USB adapter

After a little googling, I found that a Netgear A6100 needs the Realtek rtl8812au driver. There are copies of the source available on github. In order to build a device driver you first need to have the source code for your running kernel. This is where the fun starts :).
Before we start, a few useful resources
- Linux Kernel in a Nutshell contains a great introduction to building the Linux kernel and device drivers from source and explains many of the concepts you will need to get started. The book was written by Greg Kroah-Hartman one half of the Linux stable release team. This can save you a lot of time.
- The Raspberry Pi Foundation Kernel Building and Configuring the Kernel pages give you the specifics you will need to build a Raspberry Pi kernel and device drivers.
- There is a concise description of how to compile the Raspberry Pi kernel at elinux.org.
- It is useful to grab the example Hello World loadable kernel module. If you can get this to work then you are more than half way there.
Building and installing the kernel
Before you can build a device driver a copy of the kernel source is needed. This needs to be the same version as the operating system you are running or the driver will not load. You can either search for the source to your current kernel, or build and install a new kernel.
The Raspberry Pi is underpowered compared to a typical Intel based workstation. If you plan to rebuild the kernel frequently then cross compiling on a more powerful system may be a better choice.
The instructions here are for rebuilding a new kernel directly on the Raspberry Pi.
It is a good idea to build your Linux kernel from a user account, and not the root account. The additional permissions of the root account are not needed until you are ready to install the kernel.
The Raspberry Pi comes with two different chipsets, one for the earlier models A, B and B+, and one for the newer Raspberry Pi 2. Some of the steps are slightly different depending on which model you are building for.
Login under your pi account, download the latest linux kernel source from the GitHub and install any required additional software:
$ git clone --depth=1 https://github.com/raspberrypi/linux
$ cd linux
$ sudo apt-get install bc ncurses-dev
Configure the kernel. It is best to start with the default configuration and modify it if needed.
To load the default configuration for Raspberry Pi models A, B, B+
$ make bcmrpi_defconfig

To load the default configuration for the Raspberry Pi 2
$ make bcm2709_defconfig

Alternately you could copy the current running kernels configuration if it is available.
$ gunzip -d -c /proc/config.gz >.config
You may need to modify the configuration to remove an unneeded module. In my case one of the ADSL drivers did not build correctly so I removed it. Another reason to do this is to trim down the running kernel to just the components you need.
$ make menuconfig
Search for and disable any modules you don't want.
The make -j n switch can be used to build the kernel in parallel, saving time. Usually you would set n to two times the number of processors. For example on a Raspberry Pi 2 you could use -j 8.
Time to build the kernel
$ make -j 8
$ make -j 8 modules
And finally to install the kernel you will need access to the root account
$ sudo make modules_install
$ sudo make install

For Raspberry Pi models A, B, B+
$ sudo cp arch/arm/boot/Image /boot/kernel.img
For the Raspberry Pi 2
$ sudo cp arch/arm/boot/Image /boot/kernel7.img
Reboot your Raspberry Pi and check with uname -r that you are running the version you expect.
Building and loading the Hello World example module is a great way to test that everything is in order before moving on to build the driver.
Building the Netgear A6100 device driver
A quick search on GitHub should bring up a couple of rtl8812au drivers. One example: https://github.com/gnab/rtl8812au.
Copy the driver
$ git clone https://github.com/gnab/rtl8812au
You will need to make sure that the version you downloaded supports the A6100 device.
Insert the A6100 dongle
$ dmesg
...
[ 3.607714] usb 1-1.4: Product: 802.11ac WLAN Adapter
[ 3.615123] usb 1-1.4: Manufacturer: Realtek

This shows that the device is recognised by the hardware.

$ lsusb
...
Bus 001 Device 004: ID 0846:9052 NetGear, Inc.
The ID numbers are used by the operating system to locate the required device driver. By searching the driver source code for this ID you can confirm that it supports your device.
$ grep -i -R USB_DEVICE rtl8812au | grep 0846
...
rtl8812au/os_dep/linux/usb_intf.c: {USB_DEVICE(0x0846, 0x9052),.driver_info = RTL8821}, /* Netgear - A6100 */
Now that we know we have the right driver source, it is time to build and test the driver.
$ make
$ sudo insmod 8812au.ko
If this is successful your new wireless interface will be visible to ifconfig or wpa_gui, the WiFi config application.
Install the module by copying it to its new home and updating the kernel dependencies. Sometimes the make file can do this for you, however you can do this by hand with:
$ sudo cp 8812au.ko /lib/modules/$(uname -r)/kernel/drivers/net/wireless
$ sudo depmod
You should now be able to configure your new Netgear A6100 WiFi adapter. The instructions can be found here.
 One happily working gadget
Fool me once, shame on you, fool me twice, …
A few days after purchasing the Netgear A6100 I was shopping in a different store and noticed the Edimax USB adapters.
Hmm… Edimax was on the supported list …
I will post an update when I find a way to get the Edimax AC450 to work.

Hello,
First of all thanks for this manual.
I’m a linux/raspberrypi beginner and untill the “sudo make install” it worked fine!
it goes wrong on:
”
root@raspberrypi:/home/pi/comp/linux# sudo make install
/bin/bash ./arch/arm/boot/install.sh “3.18.16-v7+” \
arch/arm/boot/Image System.map “/boot”
run-parts: executing /etc/kernel/postinst.d/initramfs-tools 3.18.16-v7+ /boot/vmlinuz-3.18.16-v7+
update-initramfs: Generating /boot/initrd.img-3.18.16-v7+
WARNING: missing /lib/modules/3.18.16-v7+
Device driver support needs thus be built-in linux image!
ERROR: could not open directory /lib/modules/3.18.16-v7+: No such file or directory
FATAL: could not search modules: No such file or directory
WARNING: could not open /var/tmp/mkinitramfs_b39q0u/lib/modules/3.18.16-v7+/modules.order: No such file or directory
WARNING: could not open /var/tmp/mkinitramfs_b39q0u/lib/modules/3.18.16-v7+/modules.builtin: No such file or directory
”
can enyone help me?
extra info:
”
root@raspberrypi:/home/pi/comp/linux# uname -a
Linux raspberrypi 3.18.11-v7+ #781 SMP PREEMPT Tue Apr 21 18:07:59 BST 2015 armv7l GNU/Linux
”
Martijn
LikeLike
Hmm it looks like I stuffed up the instructions. Give the following a go
…
$ make modules
$ sudo make modules_install
(Creates the missing directory)
$ sudo make install
LikeLike
Thanks for your reply.
After your reply i tryed some things and this is whats worked for me:
$ git clone –depth=1 https://github.com/raspberrypi/linux
$ cd linux
$ sudo apt-get install bc ncurses-dev
$ make bcm2709_defconfig
$ make menuconfig
$ make -j 8 modules
$ sudo make modules_install
$ make -j 8
$ sudo make install
$ sudo cp arch/arm/boot/Image /boot/kernel7.img
Thanks for the help en this manual!!!!!
Martijn
LikeLike
I have read so many articles or reviews concerning the blogger lovers except
this piece of writing is actually a fastidious
paragraph, keep it up.
LikeLike
Thankyou for the feedback Philomena. Hoping to have something on the Edimax A450 soon.
LikeLike
I got this website from my buddy who informed me regarding this website
and at the moment this time I am visiting this website and reading very
informative content at this place.
LikeLike
Why not include Github link to actual AC1600 driver?
LikeLiked by 1 person
following your guide no luck; trying Martijn’s way still no luck same errors every time. RaspberryPi2 3.18.11-v7+ any help would be greatly appreciated.
LikeLike
i forgot the error about a thousand of these; cp: cannot stat `sound/usb/caiaq/snd-usb-caiaq.ko’: No such file or directory
INSTALL sound/usb/misc/snd-ua101.ko
cp: cannot stat `sound/usb/misc/snd-ua101.ko’: No such file or directory
INSTALL sound/usb/snd-usb-audio.ko
cp: cannot stat `sound/usb/snd-usb-audio.ko’: No such file or directory
INSTALL sound/usb/snd-usbmidi-lib.ko
cp: cannot stat `sound/usb/snd-usbmidi-lib.ko’: No such file or directory
DEPMOD 4.1.5-v7+
and before all that I get
recipe for target drivers failed.
LikeLike
This looks like a problem with the kernel configuration.
o Does /proc/config.gz exist? If so try that method.
o If not, try the default configuration: make bcm2709_defconfig
Otherwise hop into menuconfig and disable the drivers that are failing (hopefully you don’t need usb audio, midi, etc) 🙂
You may also want to upgrade. The V3.18 kernel is a little old and the kernel changed quite a bit under V4.
# apt-get update && apt-get upgrade
# rpi-update
LikeLike
Thanks for the suggestion 🙂
LikeLike
FYI, the master branch doesn’t seem so good no more, so you’re better off getting one of the versioned branch HEADs (you can download them as a zip from github) and building off that, I used rpi-4.1.y
LikeLike
How long should the “make -j 8” command take, mine has been going for 1 hour plus.
LikeLike
It should be done by now 😉
Seriously it takes a number of hours to complete even on a RPi 2.
LikeLike
Your post was very helpful and permitted me to make the following write-up on how to get the Netgear A6100 (rtl8812au) working on my Raspberry Pi 2 Model B running Raspbian Jessie 4.1.17-v7:
Find your kernel version here: https://www.niksula.hut.fi/~mhiienka/Rpi/linux-headers-rpi/
wget https://www.niksula.hut.fi/~mhiienka/Rpi/linux-headers-rpi/linux-headers-4.1.17-v7%2B_4.1.17-v7%2B-2_armhf.deb
apt-get install gcc-4.7 dkms -y
dpkg -i linux-headers-4.1.17-v7+_4.1.17-v7+-2_armhf.deb
git clone https://github.com/diederikdehaas/rtl8812AU
cd rtl8812AU
make -j 8
insmod 8812au.ko
cp 8812au.ko /lib/modules/$(uname -r)/kernel/drivers/net/wireless/
depmod
### This is driver version v4.3.14
git clone https://github.com/diederikdehaas/rtl8812AU
### This is driver version v4.2.2_7502.20130517
### If you choose this version you will need to create the symlink below.
git clone https://github.com/gnab/rtl8812au
ln -s /usr/src/linux-headers-4.1.17-v7+/arch/arm /usr/src/linux-headers-4.1.17-v7+/arch/armv7l
LikeLike